Are you looking for a last minute
Easter Crochet gift idea?
(Or you just love bunnies?)
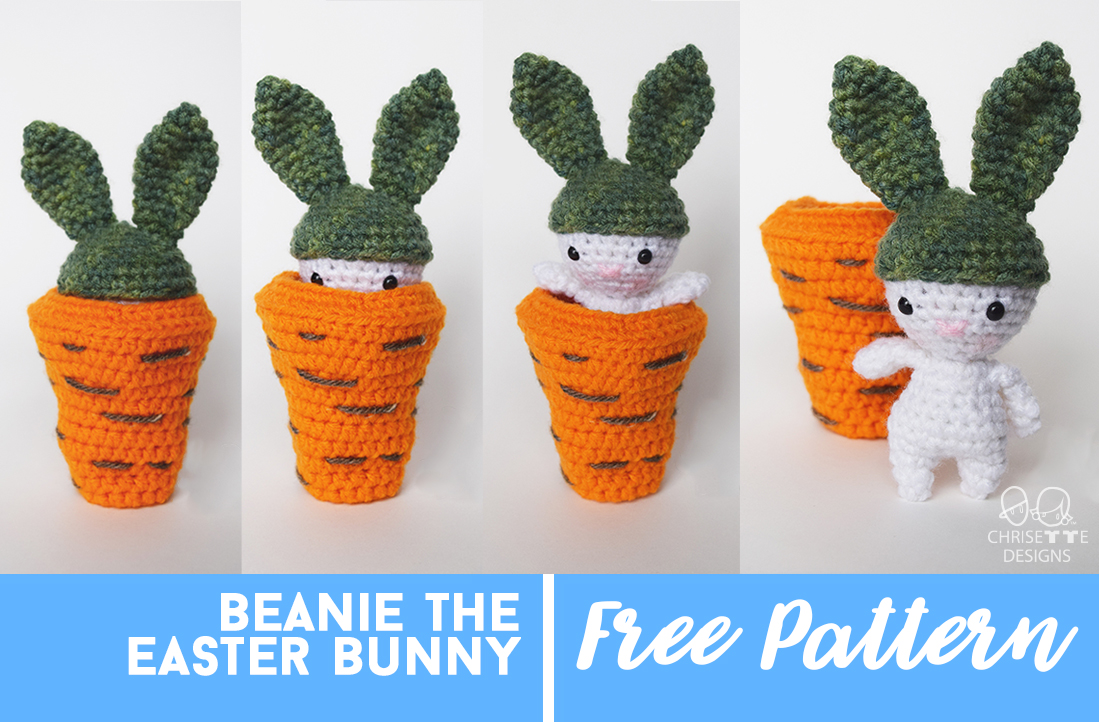
Meet “Beanie the Easter Bunny”! His name comes from my husband telling me his carrot top hat looks like a beanie! He is a master of disguise, and he’s probably hiding some Easter eggs in his carrot hideout!
I have always loved interactive crochet designs, and Beanie can stand up on his own once he is inside his carrot hideout! He makes a great desk buddy for the office too

PATTERN
PDF on Etsy here!
On Ravelry here!
NOTE: This is a Chrisette Designs original design.
This pattern is NOT to be SOLD.
You may sell what you make, but must use your own photos and should credit me by showing the link to my pattern here.
If you need assistance or find a site selling my pattern, please feel free to contact me at chrisettedesigns@yahoo.com Enjoy!
MATERIALS
- 3.75 mm hook (we want to use a smaller hook than the yarn label says because we want a tight stitch.)
- Stitch marker

3. Yarn: Size 4 medium weight.
Colors: White, green, orange, pink, brown.
4. Sewing pins.
5. Polyfil.
6. Safety eyes (6mm).
7. Cat Brush.
8. Bent Yarn Needle.
FINISHED SIZE:
Inside the carrot: about 3 inches (7.62 cm) wide, and about 5.875 inches (14.9225 cm) tall.
Bunny outside the carrot: 2 inches (5.08 cm) wide, 5 inches (12.7 cm) tall.
STITCHES: (U.S. Terms)
Magic ring: Tutorial below:
sc: single crochet
dec: (invisible decrease): single crochet 2 together.
Here is a video tutorial of the invisible decrease, which looks much better than a regular decrease that leaves bigger holes in between stitches.
st(s): stitch(es)
ch: chain
sl st: slip stitch
hdc: half double crochet.
blo: back loop only
NOTES:
1. Work in continuous rounds.
2. Using stitch markers:
Make the first stitch of the row you are starting. Put the stitch marker in the stitch you just made. Crochet around. The last stitch of the row will be the one before the stitch marker. To begin the new round, take the stitch marker out, do one stitch where the marker was, and replace the marker right where you just stitched. Here is a video tutorial:
3. You do not want to crochet too loose because you will end up seeing the white fiberfill through your stitch holes.


The legs are 6 stitches around. 
There should be 2 sts left
in between the legs.


After making 6 sc,
Sl st to the 1st st of the leg.


Front loops only 
This is after
closing the hole.


Here is a video showing the Brushed Yarn technique:


ALL FINISHED!
Now stuff him into an Easter basket!
Or make him your desk buddy at the office!
If you liked this pattern, please support me on Ko-Fi!

More bunny patterns!


I’d love to see your creations by tagging me here:
Instagram
Facebook
Twitter
 Subscribe for a FREE baby set pattern & updates! (All the cool kids are doing it.)
Beautiful pattern! He’s so cute! My daughter is very excited for me to make her one. Thanks so much for sharing your pattern!
Your welcome! Enjoy the pattern! 😊
Adorable!! I will definitely be starting this today.
Thank you for sharing your design 😊
Thank you! I hope you enjoy making him 😊
Cutest project ever! Thank you!
Aw thank you so much! I’d love to see a pic if you share it on social media and tag me @chrisette_designs (That’s Instagram) and Chrisette Designs on Facebook 🙂
This is so cute, thanks for the pattern! My son thinks it’s hilarious, he keeps “tricking” us with it.
Aw that’s awesome! I’m glad he’s enjoying it! Sometimes we make things for people and it just becomes a dust collector, so that’s so good to hear! 😊