Have you ever feasted your eyes on beautiful fuzzy yarn that would be perfect for your amigurumi project, only to be frustrated that you can’t see your stitches when you work with it?
Or maybe you just want a tiny section of your design to be fuzzy without changing to a different yarn?
(See the hair on Seymour the Sloth below)


The brushed yarn technique
is perfect for those problems!
You have WAY more control with how the yarn looks and you can really CUSTOMIZE it.
That was my #1 reason for wanting to learn this!
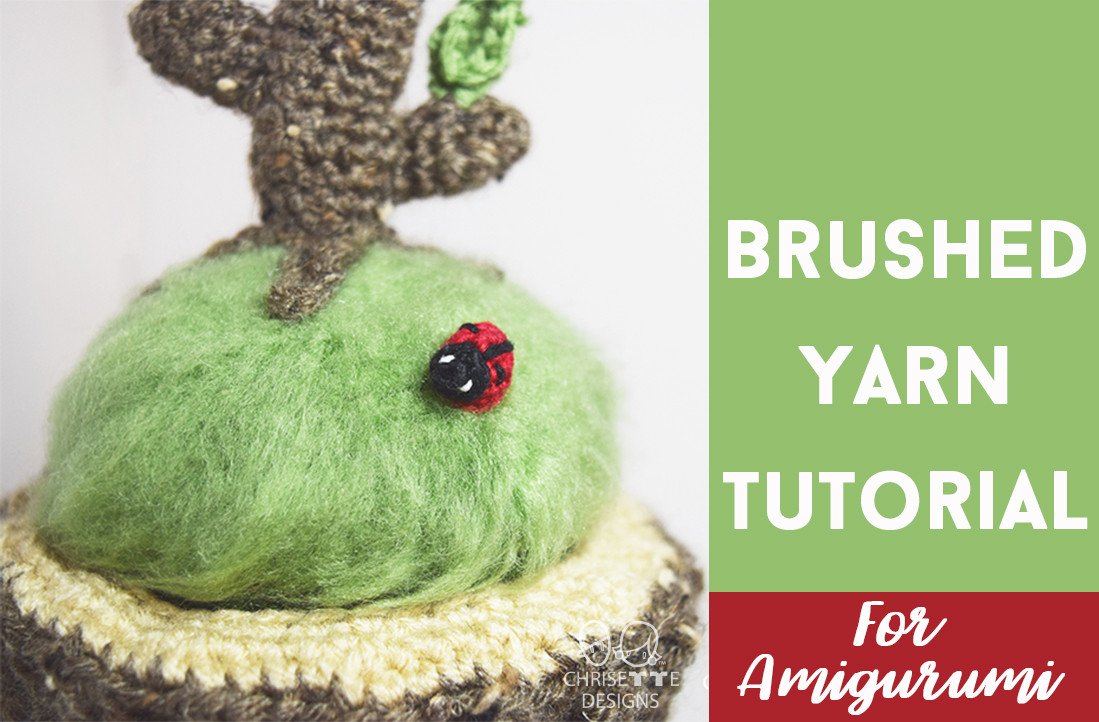
I used it on many sections of my Twigalina doll!


The Hair 
Moss on the Belly 
The Nest 
The Grass
Let’s get started!
Materials:
1. Cat Brush:
2. Yarn: I have used Hobby Lobby brand, “I Love This Yarn” acrylic yarn & Lion Brand Vanna’s Choice acrylic yarn.
It will NOT work with cotton yarn. The size of the yarn doesn’t matter, just the material it is made out of. Acrylic can withstand the pulling of the fibers without falling apart.
*Note: I have not tested this with other blends of yarn with acrylic.*

Notes
1. The more you brush, the fuzzier the yarn will get. It will also get LONGER.
2. It is better to use LESS pressure than you think and slowly apply more pressure as you get used to it. Every yarn is different, so you don’t want to apply too much pressure and end up ripping a hole into something you took time to make!
3. This works best with SINGLE CROCHET because the stitches are nice and tight.
Don’t be scared and just slowly add pressure as you try it out! I promise it won’t break if you do this.
Warning: WATCH YOUR FINGERS when using the cat brush
STEP 1: Take the crocheted piece you want to fuzz up and brush this piece with the cat brush to make it fuzz up. You want to brush in multiple directions. First, brush the entire piece in one direction. Avoid brushing the tail end of the piece since you will need it to sew onto your amigurumi. I brush the same spot about 10-15 times before moving to another spot.


This is after brushing the entire thing in 1 direction.
STEP 2: Repeat brushing the entire piece in the OPPOSITE direction.
STEP 3: Repeat brushing the entire piece in an UPWARDS direction.

STEP 4: Repeat brushing the entire piece in a DOWNWARDS direction.

STEP 5: brush the “V’s” on the

BEFORE 
AFTER
If you need to see it in action, I recorded a video as well!
I hope you feel less afraid to try this technique
If you liked this pattern, please support me on Ko-Fi!
You can get the Twigalina Pattern HERE
You can get the Seymour the Sloth Pattern HERE
I’d LOVE to see what you make with this technique by tagging me here:
Instagram
Facebook
Twitter
 Subscribe for a FREE baby set pattern & updates! (All the cool kids are doing it.)
Great tutorial! I’m loving your work!
Thanks Allison! I’m working on getting a free Easter pattern done in time for my Subscribe Tribe! 🙂
Thanks for the tutorial! I’ve been wanting to try this technique. : )
It’s so versatile! It gives so many options to add texture to amigurumi!